If you have a good strap, it will be easy to take your camera on a hike. The straps have a secure twist-and lock system that will keep your camera safe. They can be used with compacts as well as DSLRs. The durable anodized aluminum straps have a rubber washer and are strong. However, carrying a camera on a hike can be frustrating and difficult. When hiking for a longer distance, it is important to remember that carrying a camera can make you run into obstacles and damage your gear.
Point-and Shoot cameras are lighter
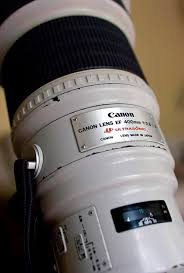
If you like the portability and lightweight of a compact camera, you can use a Point and Shoot camera. Point and shoot cameras tend to be smaller than DSLRs. These cameras can be used in low light situations to capture photos. For hiking, you will want to bring a camera with a wide angle range, 14 to 28mm. You can choose a zoom lens if you don't require a large angle range or a telephoto lens which is bigger.
They are more customizable
A camera that has adjustable storage is a must if you are planning to hike with your camera. With adjustable storage, you can carry less gear and more hiking gear. You can modify some backpacks to fit multiple lenses and cameras. This is crucial for photographers who want the best shots possible. You should also consider how much protection you need for your expensive camera equipment. Some backpacks also have pockets for memory cards and extra batteries.
They are also more durable
A weather-sealed, waterproof camera is an excellent choice for photographers who enjoy hiking. These cameras are much more durable than your smartphone's camera, and they still provide high-quality photographs. These cameras are small enough to fit in your pants pocket or bag and can be found easily. Their small size makes them much more portable than a DSLR. They're also lighter than traditional cameras.
These offer superior image quality
While it may not be essential, it is helpful to have a camera when you hike. Picking a camera that you are going to use is key. This will make it less stressful to carry around a heavy and bulky camera. For this type of trip, a camera with wide aperture and weatherproof is a great choice.
They are also more expensive
Like any other gear, hiking with your camera will cost you more. The most expensive model is the Sony RX100 VII, but it costs over $1,000! This popular camera is well-known for its high-quality Carl Zeiss lens as well as the large image sensor. The camera can also record 4K video and has RAW capabilities. The Sony RX100 VII is expensive, but a Canon PowerShot G7X Mark II is less.
FAQ
What is the best camera for beginners?
The best camera choice for beginners is determined by your budget, skills, and needs.
For instance, you could choose a point & shoot digital camera if your goal is to save some money. These cameras have a good quality, but they are not very versatile.
The Digital Single Lens Reflex (Digital DSLR) camera allows you to interchange lenses, allowing you to take different kinds of photos. These are typically more expensive than point-and-shoots, but they provide much greater flexibility.
For beginners to photography, the beginner's set is a great place for you to start. All you need is included in this package: a camera body and lens, flash, memory card, tripod and flash.
Make sure to purchase extra batteries.
Cameras: Where to Buy?
There are lots of places online where you can buy cameras. We recommend purchasing from a trusted retailer such as B&H Photo Video. Their knowledgeable staff can answer any questions that you might have.
B&H ships securely and quickly, so you can get your order delivered right at your door.
Check out this video to learn more about purchasing cameras.
Light Room can enhance your photos.
Start early to get the best photos possible for your project. It's better to take as much as possible, then select the best.
Lightroom makes this possible by showing you how different settings affect each photograph. These settings can be adjusted on the fly without having to go back into Photoshop. This allows you to quickly test what looks great and what does not.
Which Lenses should I Use?
The most common question beginners ask is, "what lens should I buy?" It's a tough decision since there are so many options available.
You don't have to buy a brand new lens each time you purchase a new camera. You can always add lenses later.
For starters, here are three types of lenses you might want to consider.
-
Wide Angle Lens (14mm-24mm): These lenses offer a wide field of view that allows you to capture more detail. Zooming in can be done without affecting image quality.
-
Normal/Standard Zoom Lens (28mm to 70mm) : These lenses allow you the flexibility of changing focal lengths, while still maintaining high quality images.
-
Telephoto Zoom Lens (70mm to 200mm): These lenses make it easy to capture distant subjects. They let you focus on your subject even though they appear small in the frame.
Combining lenses can create different effects. Combining lenses can create different effects. For example, a normal lens could be used to capture small details while a telephoto lens is used to capture faraway objects.
How do I look beautiful in photographs?
You will look your best in photos if they are taken by you. You will learn how to pose, which angles are flattering and which are not. Additionally, you'll learn how to use lighting and props in order to enhance your natural beauty.
Learn how to select clothes that fit you well, what make-up looks good on you and what hairstyles best suit your style.
If you are not happy with your results, we will show you how you can retouch them using Photoshop and other editing tools.
So, go ahead - take some self-portraits!
How can I learn photography by myself?
If you want to learn how to take great photos, there are many ways to do this. You have many options. You could purchase a book or attend a class. Or you could join an online group. You can't go wrong with doing it yourself if you are serious about mastering the art of photographing. By doing it yourself, you are in complete control of what goes into each shot. You will continue to learn and improve, so long as you are willing to keep learning.
In fact, one of the best things about digital photography is that you don't even need expensive equipment. You only need a computer and an internet connection to take pictures. The rest is up to you.
Here are some ways to get started.
-
Make sure you are familiar with your camera’s manual settings.
-
Learn the basics of controlling your computer.
-
Make sure to take lots of pictures.
-
Modify them.
-
These should be shared.
-
Keep practicing.
-
Experiment.
-
Consider different angles and perspectives.
-
Use light sources creatively.
-
Practice makes perfect.
-
You don't have to be afraid of failing.
-
Be patient.
-
Have fun!
Statistics
- There are people out there who will pick at flaws they can only see in 100% crops of your photos. (wikihow.com)
- This article received 13 testimonials, and 100% of readers who voted found it helpful, earning it our reader-approved status. (wikihow.com)
- In this case, 100% of readers who voted found the article helpful, earning it our reader-approved status. (wikihow.com)
- That's the easiest way to get blurry photos 100% of the time. (photographylife.com)
External Links
How To
How to take macro photographs in photography
Macro Photography is defined as the ability to capture small objects such as flowers, insects, and even people at close range. Macro (from the Greek makros, meaning large) is from the Greek word makros. It is possible to capture images of very close objects if you have a lens with a focal range greater than 50mm.
A good macro lens must have a long work distance and a fast aperture so that sharp images can be captured without having to move around. Also, avoid moving while taking photos as it could blur your image.
Here are some tips and tricks to make great macro shots:
-
Use a tripod. You can use a tripod if you don't own one. This will ensure that you have less movement while shooting.
-
Select the right lighting. You can get a macro lens with built-in lights filters. However, if you don’t have one, you can purchase one. This helps prevent overexposure.
-
Be patient! Shooting macros takes practice. Sometimes, you may only be able to see a small bug or flower. But it's worth the effort to keep taking pictures until you get it.
-
RAW files are best for shooting. RAW files store more data than standard JPEGs. RAW files allow you to make changes such as cropping, color correction and other adjustments later.
-
Do not forget to add the background. Even if your foreground object is beautiful, the background can still add interest to your photo. You should include it in any photo.
-
Keep learning.