Canon cameras have a GPS feature that can be used to track your location and take photos. This feature can be used to help you create your composition and obtain the best exposure. If you shoot at night, it can help you adjust the exposure.
Canon cameras come in 15 different models that support GPS. Some cameras are equipped with an antenna built in, while others require an external module or receiver. The inbuilt antenna receives signals sent by GPS satellites. The device's position, altitude, and speed are then triangulated. This information is stored in the EXIF data of the image. This data can then be used to pinpoint the image’s exact location on a Google map.
You can turn the GPS function on or off by using a switch located on your camera. It is best to not leave the GPS function turned on constantly as it can cause battery drain. It may not work indoors. Signal acquiring may be limited. It can take between 30-60 seconds and 60 seconds to connect with GPS satellites, and then acquire the location.
The Mode 1 or 2. modes can be used to set the GPS function on a Canon camera. Mode 1 allows the GPS function can be turned on while the camera is being used. Mode 2 allows for the GPS function to be disabled while shooting.
The Pro2-EOS GPS receiver is for Canon EOS (Rebel System) cameras. It communicates with your camera via a USB cable. It can be used as a wireless camera controller and for concurrent backup of files.
Some cameras, such as the Nikon D4 and the Canon EOS 5D Mark III, have an external receiver. These receivers run on the battery of the camera. The Pro2-EOS can be used to track GPS tracks and can be used with most Canon DSLRs.
The Pro2-EOS LCD monitor displays the major GPS information live. The screen also features an auto time setting feature and digital compass calibration. The LCD is powered by an internal rechargeable Lithium battery. It also displays the direction and time of shooting in UTC.
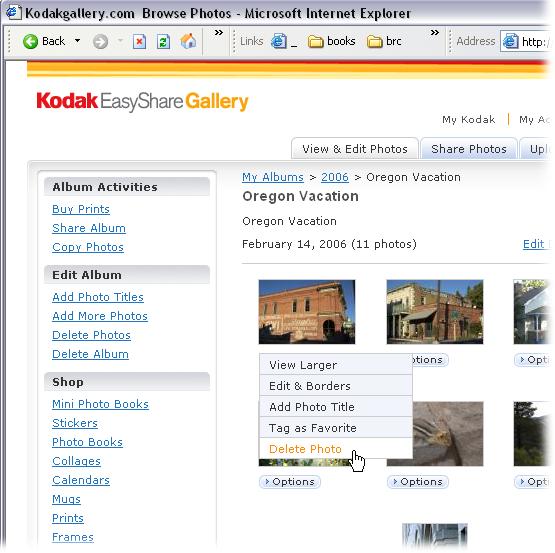
When you shoot with a GPS enabled camera, the GPS information is automatically included in the EXIF metadata of each image. This information is then stored on your memory card and can be used to pinpoint the location of the camera on a map. The Canon EOS 6D as well as the EOS 6DMark II have GPS functions. Canon Camera Connect lets users access their camera's GPS function via their iPhone or Android phones. The app can also send images to their phone or share them with other people.
Nikon has 33 cameras equipped with GPS. Most models run on the same battery. Some models require an additional AA batteries for the external receiver. You can view GPS-tagged images using the Nikon Image Space app on iPhone and iPad.
Pentax OGPS1 hotshoe mounted units can also work with cameras with GPS functions. The unit performs the geotagging function and can be used for long exposures.
FAQ
How can I learn photography by myself?
There are many options for learning how to take great photographs. You could buy a book, attend a class, join an online community, watch YouTube tutorials, etc. There's no better way to learn the art of photography than by doing it yourself. That way, you have complete control over what goes into each photo. You will continue to learn and improve, so long as you are willing to keep learning.
The best thing about digital photography? You don't need any expensive equipment. All you require is an internet-enabled computer and a good camera. All the rest is up to your imagination.
Here are some tips to get you started.
-
Acquaint yourself with the manual settings of your camera.
-
Learn how to use the basic controls.
-
Take lots of photos.
-
Make sure to edit them.
-
Please share them.
-
Keep practicing.
-
Experiment.
-
Try different angles and perspectives.
-
Use light sources creatively.
-
Practice makes perfect.
-
Never be afraid to fail.
-
Be patient.
-
Have fun!
What is the rule of thirds in photography?
The rule of thirds is an easy way to create interesting compositions without using complicated camera settings. It divides your image into nine equal parts, horizontally and vertically. This creates three main areas in which you want your subject. These are the top third (the upper left corner), middle third (center), and bottom third (lower right). These areas can be used to position your subject within your frame.
The rule of threes can also help you avoid placing important items too close together. You might not have enough space between them for a strong visual impact if you put them close together. You might find that they lose focus if you place them too close together.
Is digital photography hard?
Digital photography isn't as simple as you might think. It takes time to master the tools. It is important to be familiar with the settings that are best for each type of shot. Experimenting is the best way of learning. Practice makes perfect.
Which Lenses should I Use?
Beginners often ask, "What lens should I purchase?" Because there are so many options, it can be difficult to choose.
The good news is that you don't necessarily need to buy a new lens every time you purchase a new camera. You can always add lenses later.
Here are three types of lenses to start with.
-
Wide Angle Lens (14mm to 24mm): These lenses allow you to see more of your subject from a wider angle. You can zoom in and not lose image quality.
-
Normal/Standard Zoom Lens (28mm to 70mm) : These lenses allow you the flexibility of changing focal lengths, while still maintaining high quality images.
-
Telephoto Zoom Lens (70mm–200mm) : These lenses are ideal for photographing distant subjects. They allow you to focus on your subject despite the fact that they may seem small in the frame.
You can also combine these lenses to create different effects. You can use a normal lens for close-up detail and switch to a zoom lens to capture distant objects.
What equipment is necessary to begin digital photography
When you start out in digital photography, the first thing to consider is which type of camera you will use. There are many options: DSLRs (digital Single Lens Reflex Cameras), point-and–shoot compact cameras or camcorders. Each one has its advantages and disadvantages. DSLR cameras, however, are larger and heavier than most other types of cameras. Point-and-shoot cameras are smaller and lighter and often include automatic settings for certain situations. Camcorders are capable of recording excellent video quality and can also be used to take still photos. Smartphones are lightweight, portable, and light. They offer excellent image quality, advanced features, such as GPS mapping, music playingback, and Internet browsing.
Once you've chosen the type of camera that you want, you can decide whether to purchase a used or new model. Even if the cameras were bought in the last few decades, they can still be purchased at reasonable prices. Newer models usually cost more as manufacturers invest large amounts of money to develop new technology.
Next, you will need to purchase lenses. Lenses play a key role in determining the quality of your photographs. These lenses allow you control the focal length of your lens, which allows you to zoom into the scene and not lose focus. Some lenses can be equipped with flash units that are built-in, while others may require external flash units. There is a wide selection of lenses available from different brands. Each lens has its own characteristics.
You will also need memory cards. Memory cards are used to store images taken with your camera. You can store hundreds, thousands, or even more pictures depending on the size of the card. If you plan to shoot lots of pictures, you will need multiple memory cards.
What makes an excellent camera bag?
Choosing a camera bag is important because it protects your gear while traveling. Here are some things to remember when buying a bag.
-
The bag should be large enough to comfortably hold your accessories and cameras. Don't get any bigger than you really need.
-
Durability: Buy bags made of durable materials like canvas, nylon or leather. Avoid fabric and plastic bags.
-
Protection: Make certain your bag is protected against dirt, dust, moisture, and scratches
-
Organization: Sort your gear by type in order to make it easy to access the items you need. You can put your lenses in one place, your memory cards and your battery charger another.
-
Comfort: Keep your hands free when shooting by using a shoulder strap instead of a handbag. Also, look for a comfortable design with padded straps.
-
Price: Check around to find the best prices. Many brands offer their products at discounted prices. This can be a huge advantage.
-
Warranty: Check to see if the company offers a limited warranty. You will know who to call if your bag gets damaged.
Statistics
- There are people out there who will pick at flaws they can only see in 100% crops of your photos. (wikihow.com)
- While I cannot prove that all of those spots were not sensor dust, the photo was taken during a heavy snowstorm…so I guess that 99.8% of the spots are snowflakes. (bhphotovideo.com)
- The second easiest way to get blurry photos 100% of the time is to use a cheap filter on the front of your lens. (photographylife.com)
- That's the easiest way to get blurry photos 100% of the time. (photographylife.com)
External Links
How To
How to Take Portrait Photos
Portraits are important, because they reveal who you truly are. They tell your story. It's possible to have a favourite picture of yourself, but you are now looking for something different. It's easy not to remember how much fun photographing can be. These are some tips that will help you get started.
-
Make sure you have enough light. It is best to take portraits in the morning, or late afternoon. Make sure you don't have direct sunlight shining on your face if you are using flash. This will wipe out any details. It is best to avoid shooting at midday. There will be too much shadow.
-
Use a tripod. A tripod will prevent you from seeing any movement when you hold the camera still. This means that you will miss the opportunity to freeze motion. Set up your shot before you use a flash. You can then turn the flash off and try again.
-
Take close-ups. Closeups are great to demonstrate detail. If you have a bad eye, closeups can appear fake. Pay close attention to people's eyes and noses. Are there any unusual features? Do you see someone with glasses? Are there freckles on the nose of someone wearing glasses? These are subtle details that add depth to someone's appearance.
-
You shouldn't force smiles. Smiles are difficult. Smiles are tricky. Some people smile naturally when they are happy. Others don't. You cannot force them to smile. Think about what makes you laugh. Maybe it's something silly like a cat jumping through a hoop. Maybe you just love to watch paint dry. Whatever it is, keep thinking about it until you start laughing.
-
Get creative. People are often afraid of being boring. It's not bad to be boring. Find ways to get out of the normal. You could ask your friend to put his hands behind his back and pose with them. Or you might suggest having him wear a funny hat.
-
Keep practicing. Practice every day and you will eventually be a better photographer. As you improve, you'll notice more interesting things happening around you.
-
Have fun. You should have fun taking photos. If you enjoy the experience, you will be more likely do it again. You might even end up with some pretty cool photos.
-
Please share your work. Once you learn how to take good pictures, share them with friends and family. Tell them why the photo was taken. Show them the place you were. Let them know what your experience was.
-
Be patient. Sometimes, you won't get it right. It happens to everyone. Don't worry. Just move on to another image.