
Different types of filters will be required depending upon the camera. These filters include polariser, warming and cooling, polariser, and variable neutral density (VND) filters. This article will discuss the various types of filters available for cameras. You should now have a better understanding of the types of filters your camera needs.
Variable neutral density filters
Variable neutral density filter are an important tool for photography. They can be used to adjust the exposure of a scene or to darken the view through the filter. Because it can be adjusted at different densities, this type of filter is easier than traditional ND filters.
Variable ND filters are available in many sizes and prices. The ND filters feature a ring with markings which allows you to alter the blocking strength. They are cost-effective, reliable, and easy to use. Amazon UK sells filters such as the Hama Vario ND2-400. This model provides ND up to 8 stops. Tiffen also offers variable ND filters.
Polariser filters
The polariser filters for cameras can be either circular or linear and block reflected sunlight. These filters are threaded onto the front lens of the camera, similar to a UV filter. While their polarizing qualities are intact, they don't cut glare if turned in the wrong way. Square polarisers work regardless of the direction.
Polarisers can reduce sharpness. This can lead to unusual polarisation patterns or undesirable color casts. They can also cause shutter speeds slowing down.
Colour filters
Cameras with colour filters allow you to alter the way the light enters the camera. These filters are made of a piece colored glass that is placed in front the lens. Different filters have different benefits. Blue filters enhance reds by playing up contrast while green filters are good for skin tones. They can also be used under artificial lights. These filters can absorb both green and blue light and can make black and/or white photos look richer. Yellow filters are used to make landscapes appear more real.
Post-production is where colour filters are most commonly used. These filters can be used in post-production to improve the contrast and reduce blemishes. These filters can also be used to separate colours in mixed-color scenes. While most filters have a factor of 2 for filtering, manufacturers will often give you an exact value. TTL metering will compensate for the filter factor if it is used in your camera.
Heating and cooling filters
To adjust your camera's white balance, you can use both warming and cooling filters. Cooling filters reduce the scene's temperature while warming filters make it appear warmer. A warming filter is used to create the effect of the golden hour, while a cooling filter produces a cooler effect. If you want your sunset photos to look redder, you can use warm filters.
Warming and cooling filter can also restore color to a photo by using other sources. A streetlight filter for example can restore color to a scene. This type of filter isn't necessary for digital cameras. They can automatically adjust the white balance when you take a photo. If you take pictures underwater, you can use a color filter.
FAQ
Do I Need A Tripod?
This is a question everyone asks. While a tripod isn’t necessary every time, it is useful.
A tripod allows you to stabilize your camera when taking photos at slow shutter speeds. A tripod can make all the difference when you're photographing landscapes or other stationary subjects.
A tripod can also cause blurriness when you are photographing people or sports. So, how do you know which situations require a tripod?
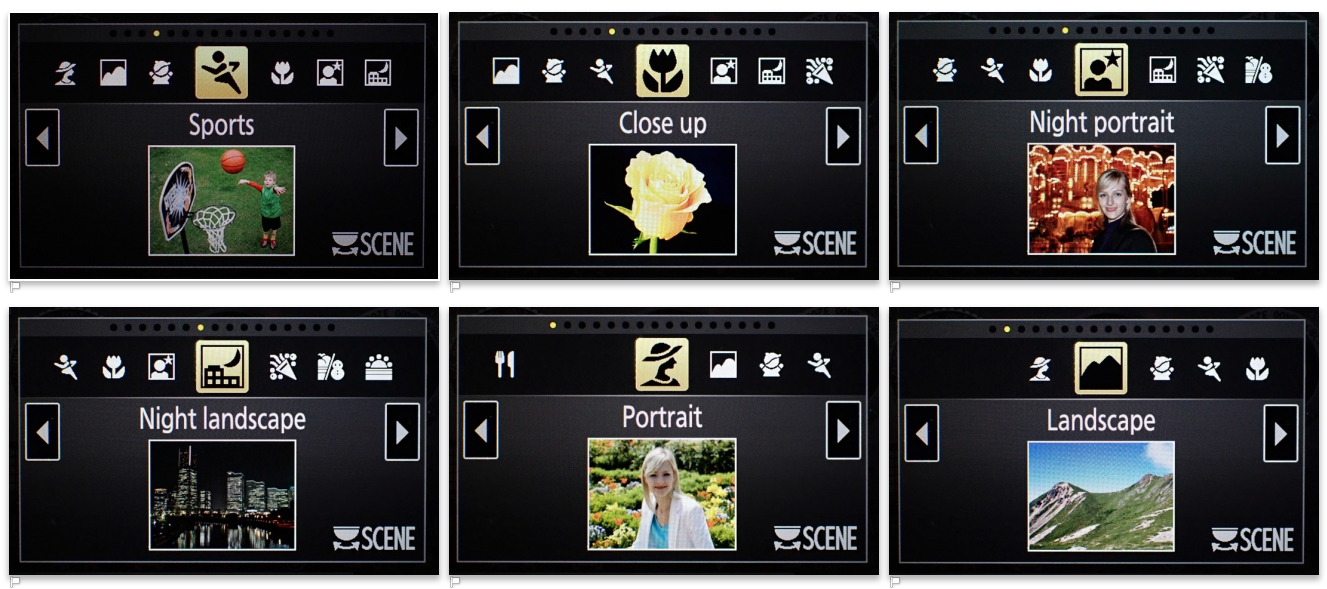
A tripod is useful for any situation where you want to photograph fast action or stationary subjects. Examples include:
-
Sports
-
People
-
Landscapes
-
Close-ups
-
Macro shots
Try this test to find out if you really need a tripod. You can hold your camera still while you look through the lens. If you see blurred lines or movement, then you definitely need a tripod.
If you don't see any blurring, you probably won't notice any improvement by adding a tripod.
These are just a few tips to help you decide whether or not to purchase a tripod.
-
You should ensure that your tripod has smooth legs. This will prevent unwanted vibrations from shaking your lens.
-
A tripod is a good choice. Some tripods are made out of plastic and may not be very durable. Look for a metal tripod instead.
-
Consider purchasing a remote release. This allows you to control your camera remotely. This allows you to set the shutter to automatically fire when you press it.
-
You should look for a tripod with 360 degree rotation. It makes it easy to position your camera horizontally or vertically.
-
Keep in mind that tripods aren't cheap. Expect to pay between $100-200. However, you'll get a lot of value for your money.
-
Don't forget accessories such as memory cards or filters.
-
Before ordering online, you should check in your local shops. Many retailers offer free shipping.
-
Read reviews to determine what customers think about a particular product.
-
Ask your family members and friends to recommend similar products.
-
You can learn from customers' experiences by visiting message boards and forums.
-
You can search online for reviews from other users.
-
Amazon.com is a website that allows you to compare prices and get customer feedback.
-
Take a look at these photo galleries to see what other photographers do with tripods.
Is photography a talent
Photography is not an artistic talent. It is an art that takes practice, training and experience. To master any aspect of photography, it takes years of practice and study.
You need to plan how you will make money in photography.
You need to know what type of clients you are looking for and how you can reach them.
It is important to understand who your customers are and what their needs are. You need to be able communicate clearly and persuasively in order to persuade your clients to purchase your services.
This means that you will need to be well-organized and prepared when you meet potential clients.
When you are ready to approach potential customers, you will need to create a portfolio of your work. You can either create a portfolio digitally with software programs, or print it on paper.
Once you have created a portfolio, you must look for opportunities to show it off. You could approach businesses directly or post ads online.
Which Lenses should I Use?
Most beginners will ask this question: "Which lens should I buy?" There are many options. It can be difficult to make a decision.
The good news is you don't always need to buy a different lens with every purchase of a camera. You can instead add lenses later.
There are three types possible lenses.
-
Wide Angle Lens (14mm-24mm): These lenses have a wide view angle that will allow you to capture more of your subject. Zooming in can be done without affecting image quality.
-
Normal/Standard Zoom Lens (28mm to 70mm) : These lenses allow you the flexibility of changing focal lengths, while still maintaining high quality images.
-
Telephoto Zoom Lens (70mm, 200mm): These lenses work well for distant subjects. These lenses allow you to focus on your subject, even though they may appear small in the frame.
These lenses can be combined to create different effects. One example is to use a regular lens to photograph close-up details and then switch to a long-range lens to capture faraway objects.
How can I be a great photographer?
Photography is an art form that requires patience, dedication, passion and dedication. If you love photography, you'll be doing better than if only you were going after the money.
It is essential to understand how to use your camera effectively. Understanding composition, lighting, exposure and depth of field are all important. A good understanding of Photoshop is also necessary.
Photography can be difficult but once you get the hang of it, it's a rewarding art form that allows you to capture moments in time that otherwise would have gone unremembered forever.
You can improve your skills by reading books, attending classes, and participating in competitions. You'll gain experience and confidence which will lead to further improvement. What equipment do you need?
It all depends on what type photography you do. If you are interested landscape photography, you will need to have a wide-angle zoom lens.
If you're interested in portrait photography, you should get a telephoto zoom lens.
Photographers need a tripod. It allows you stand up and compose your photo without moving.
Camera bags can be useful for carrying your camera and memory cards as well as other accessories.
If you're using a compact camcorder, a flash device is essential.
For beginners looking to capture professional-quality photos, a DSLR (Digital Single Lens Reflex Camera) is the best option.
DSLRs are very popular because you can control every aspect of the photo including shutter speed, apertures, ISO sensitivity and white balance. There are many features available, including autofocus, self-exposure lock (auto-exposure lock), bracketing, and RAW format.
What Camera Should I Get?
All depends on the type of photographer that you want to be. For beginners, a simple point-and-shoot is the best camera.
You'll probably want something more advanced once you've learned the basics. The choice really comes down to personal preference.
These are some things you should consider before buying a camera.
-
Features: What features do I need? Are you going to use autofocus, manual settings, or both? What number of megapixels has your camera? Is there an optical viewfinder?
-
Price: How much money are you willing to spend? Do you plan to update your camera every other year?
-
Brand: Is it possible to be happy with your brand choice? There is no reason to settle for less than the very best.
-
Functionality: Can your camera work in low-light conditions? Can you take high resolution photos?
-
Image Quality: How sharp and clear are your images?
-
Battery Life: How many charges will your camera take to run out?
-
Accessories: You will be able attach additional lenses, flashes and other accessories. ?
How can I improve my photography skills on my phone?
To take amazing photos, you don't necessarily need to have expensive equipment. Amazing photos can be taken with your smartphone.
It's easy to get started with the software.
There are many apps to help you edit and share your photos on both Android and iOS.
These five tips will help you take better photos.
-
Set Up Your Camera App. Your camera app should come pre-installed on your device. Download it from Google Play, Apple's App Store or Google Play.
-
Use Effects & Filters. Effects and filters allow you to alter the appearance of your photos without needing to touch them.
-
Adjust Exposure. Adjusting exposure helps you control the brightness of your picture.
-
Make sure you are shooting in the right light. Photographing in bright lighting makes it easier for you to see details within your subject. If you shoot in low light, it is possible to capture shadows or highlights in your photo.
-
Photograph People. You can share the things that you love most by taking photos of others.
Check out this article to learn how to take better pictures with your smartphone: 5 Tips To Improve Photography Skills
Statistics
- By March 2014, about 3 million were purchased monthly, about 30 percent of the peak sales total. (en.wikipedia.org)
- In this case, 100% of readers who voted found the article helpful, earning it our reader-approved status. (wikihow.com)
- The second easiest way to get blurry photos 100% of the time is to use a cheap filter on the front of your lens. (photographylife.com)
- There are people out there who will pick at flaws they can only see in 100% crops of your photos. (wikihow.com)
External Links
How To
How to photograph in low light conditions
Low-light photography means taking photos in dimly lit areas. It requires special equipment. The main challenges in this field include controlling exposure, whitebalance, and sharpness. Low light photography can be divided into two categories: ambient and flash. Flash photography is best when there is enough light. A flash is required if there isn’t enough light. A flash might be necessary if you are photographing a subject indoors and outside. If you don't want to use a flash, try shooting at night during the moonlit hours. You will get beautiful shadows and colors. Another option is taking photos at twilight. Twilight is when the sun sets but there's still daylight.
Also, you might want to try long exposures. Long exposures can be used to capture images even if the shutter has been closed for several minutes. If the shutter is closed, the camera records only the light that falls onto the sensor. This light falls onto the sensor even after a long exposure. However, because the shutter remained shut, no new light enters the lens. Therefore, there is very little movement. Turn off autofocus and autoexposure to ensure you get clear images. Adjust the ISO setting before you start to shoot. An ISO setting of 200 allows you to adjust how bright or dark the image looks. When you're ready for the shot, press quickly the shutter button. This will bring the shutter completely to a close. Next, hold the shutter button down until the end. You will prevent additional light from entering your camera by keeping the shutter button down. Once you take the shot, wait a while before you release the shutter. This allows the camera's to process the image. You can view your photos while you wait on the camera. Save them once you are satisfied with them.