Photography is an art, and it is not easy to capture great images. However, there are many ways to improve your photographs. For example, a common technique that nearly all photographers use is the 'Rule of Thirds'. It may sound complex to the untrained eye, but it's actually one of the most basic photography tricks around.
Fill the frame
Experimenting can help you learn how to fill your frames in your photos. You can try moving your perspective or hiding distracting elements in order to create a better composition. Even small adjustments can make a huge difference in your photos.

Adjusting camera settings
To take stunning photos, you must know how to adjust your camera settings for the correct exposure. A camera's ISO setting determines how much light is captured by the sensor. It directly influences exposure and digital sound. The best ISO setting for your camera depends on the size of your sensor and the type or photography you are doing. The ISO setting is generally more noisy and grainy than the photos.
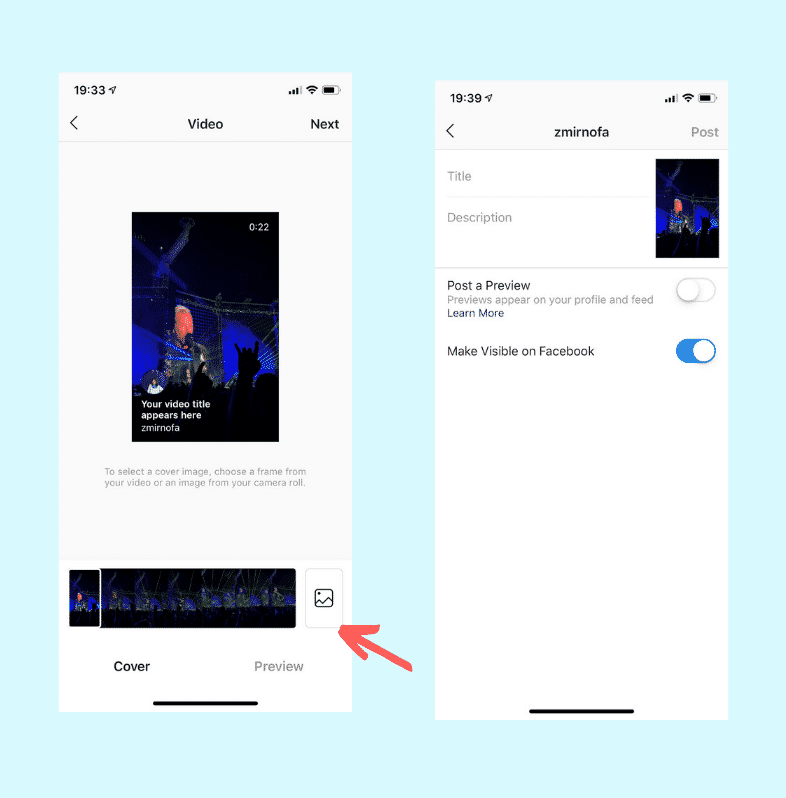
Establishing a strong focal point
It is essential to place the focal point correctly in order to create a photo that is effective. Unplaced focal points can distract the viewer from your subject. As an example, take the image below which shows a boy raising his hand and pointing. The photograph was set up by the photographer to make the hand of the boy the main focal point. The main focus is not just the hand but the fingers and thumb are also important.
Getting off of automatic mode
Professional photography requires you to get off the automatic mode. You will need to take your shots of landscapes and other scenes. If you shoot fast-paced subjects, however, you might want to use the auto mode.
Use external flashes
An external flash can be used to lighten a subject. They can create pleasing shadows and bounce light from the ceiling or walls for photos with more depth and artistry.
A solid background
The background can be a crucial element in professional photography. The background can either enhance or detract from the overall appearance of your photo. Make sure you choose the right type and color of lighting to ensure your photo is free from distracting elements. Shadows are a major mistake made when shooting with a backdrop. High-key lighting can help you avoid this problem. High-key lighting can "blow out the background" and give your subject a clean appearance.
FAQ
Should I start photography as a hobby?
Photography is a wonderful way to share memories with family and friends. Photography also lets you learn more about the world around.
If you are interested learning how to take better photos, there are plenty online resources that can help.
Consider enrolling at local art schools or community colleges. This gives you the opportunity to meet other photographers, who can offer valuable feedback.
Light Room is a great way to enhance your photos.
You can get great photos if you start early. It is always better to take as many photos as you can and then choose the best.
Lightroom allows you to do this by letting you see how different settings affect each photo. You can also adjust these settings on-the-fly without going back into Photoshop. This allows for quick experimentation with what looks good or not.
Is digital photography hard?
Digital photography isn’t as easy as you may think. To use digital photography properly, it takes patience and effort. For different shots, you need to know which settings to use. It is best to practice what you have learned. Practice makes perfect.
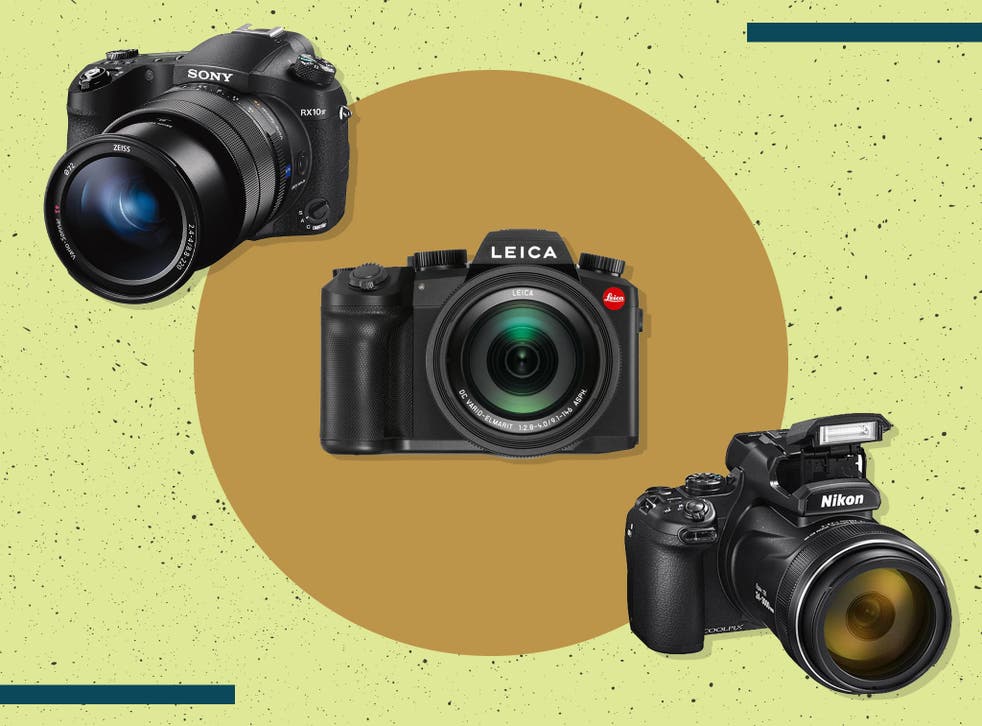
What Camera Should You Get?
It all depends on your goals and what type of photographer you are. For beginners, a simple point-and-shoot is the best camera.
However, once the basics are mastered, it's likely that you will want more advanced features. The decision is yours.
Before you buy a camera, here are some points to remember.
-
Features: What features are you looking for? Do you intend to use manual or autofocus settings? How many megapixels do you have on your camera? Is there a viewfinder?
-
Price: What amount are you willing spend on your camera? Are you planning on upgrading your camera every two years?
-
Brand: Are you happy with the brand that you choose? There is no reason you should settle for less.
-
Functionality: Can you use your camera in low light situations? Are you able to take high-resolution images?
-
Image Quality: How clear and sharp are your images?
-
Battery Life: How much time will your camera last without needing to be recharged?
-
Accessories: Do you have the ability to attach flashes, additional lenses, and so forth? ?
How can I learn photography by myself?
There are many ways you can learn to take great pictures. You could buy a book, attend a class, join an online community, watch YouTube tutorials, etc. You can't go wrong with doing it yourself if you are serious about mastering the art of photographing. So you can decide what goes into each picture. As long as you continue learning, you will always be improving.
Digital photography doesn't require expensive equipment. All you need is an internet connected computer and a camera. The rest is up for you.
Here are some ways to get started.
-
Make sure you are familiar with your camera’s manual settings.
-
Learn how to use the controls.
-
Take lots of photographs.
-
These should be edited.
-
Share them.
-
Keep practicing.
-
Experiment.
-
Explore different perspectives and angles.
-
Use light sources creatively.
-
Practice makes perfect.
-
Be willing to fail.
-
Be patient.
-
Have fun
Statistics
- In this case, 100% of readers who voted found the article helpful, earning it our reader-approved status. (wikihow.com)
- By March 2014, about 3 million were purchased monthly, about 30 percent of the peak sales total. (en.wikipedia.org)
- While I cannot prove that all of those spots were not sensor dust, the photo was taken during a heavy snowstorm…so I guess that 99.8% of the spots are snowflakes. (bhphotovideo.com)
- Get 40% off Adobe Creative Cloud(opens in new tab) (creativebloq.com)
External Links
How To
How to take photos in low light conditions
Low-light photography can be defined as taking photos in dimly lit and dark environments. It requires special equipment. Controlling exposure, white balance, sharpness, and contrast are the main challenges. There are two types low-light photography: ambient and flash. Flash photography works best when there's enough light around. If there isn’t enough natural lighting, you will need to use a flash. You might need a flash if your subject is outside but indoors. Shooting at night in the moonlight hours is a good alternative to using a flash. This way, you'll get some nice colors and shadows. Another option to consider is shooting during twilight. Twilight occurs when there is still daylight but the sun has set.
You may also want to experiment with long exposures. Long exposures enable you to take images even after your shutter has been open for several seconds. The camera records only light that falls on it if the shutter is not closed. This light will continue to fall onto your sensor after a long exposure. The shutter was not opened, so no new light entered the lens. This means that you will not see any movement. To ensure a clear image, you should turn off all automatic settings such autofocus or exposure. Make sure to adjust the ISO setting before starting to shoot. A 200 ISO setting gives you greater control over how dark or bright your image looks. The shutter button should be pressed quickly when you are ready to take the photo. This will bring the shutter completely to a close. Keep the shutter button pressed down until the last second. You can prevent any additional light entering your camera by holding the shutter button down. Wait a few seconds after you have taken the photo before you release the shutter button. This allows the camera's to process the image. You can view your photos while you wait on the camera. Once you are satisfied, save them on your computer.