
The Canon PowerShot D30 waterproof camera is very affordable. This camera is also very sturdy, making it an excellent investment. You can read more about the camera here. The Canon Ivy Rec is also available. However, a waterproof case is the best protection for your camera.
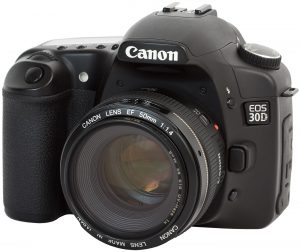
Canon PowerShot D30
Canon PowerShot D30 is a popular camera in its category. Its waterproof capabilities are suitable for scuba divers and open water divers. It can withstand drops of up to 6.5 feet and is shockproof. It isn't the best waterproof camera on the market, but it has some great features that make it worth a look.
The D30 feels sturdy, and it is easy to hold. Its chassis is made from heavy duty plastics with a metal face plate. It has a rubberized thumbpad on the back and a wider finger pad on the front for a secure grip. It also features a wrist strap which can be tightened for added security.
Canon EOS R
Canon EOS R has a weather-sealed waterproof camera to ensure that it works well in all conditions. The camera is waterproof enough to be used in both light rain and heavy rain. This waterproof camera is great for photographers who need to protect their cameras while on the road.

Its waterproof housing made of corrosion-free ABS/PC Composite material. The controls of the camera are functional and simple to use. It is a good option for budget-conscious users. It also features a TTL convertor that is very accurate and a trimrail system, which balances the buoyancy of large dome ports.
Canon Ivy Rec
The Canon Ivy Rec waterproof camera has a distinctive design that makes it easy to transport and use while on the move. It's frame extends to the outside and features a carabineerclip. This allows it to attach to belt loops, Molle web, or backpack straps. Although this waterproof camera isn't intended to be used for running, it's easy to use and transport without having to trip over buttons or cords.
In addition to being waterproof, the Canon IVY REC is also shockproof, which means that it won't break when dropped. Because of its Bluetooth and WiFi connectivity, the camera can also be used with mobile devices. The app lets you frame and transfer your photos, as well as set the self-timer and keep track of battery levels.
Canon Ivy Protect
Canon Ivy Protect waterproof cam is waterproof, waterproof, shockproof and wireless. It features Bluetooth and built-in Wi Fi. The case is also affordable and seals well. The DiCaPac Waterproof Case for DSLRs is waterproof and shockproof, and can protect your camera from water and dust.
The new camera is designed to be fun, but it also has a function for more serious photographers. It includes a shockproof protector, wireless connectivity, a built-in carabiner and wireless connectivity. It also supports Canon Mini Cam App. This app allows you create photos, to share them with friends and edit them right from your phone.
Canon Ivy Protect II
The Canon Ivy Protect II waterproof, dustproof, shockproof printer is an excellent choice. This waterproof case is portable and lightweight, so you can take photos anywhere there's water. It also allows you to view, edit, or print photos without opening your camera.
You can use it as a camera because it features an elastic strap built in and an all-around zipper. The camera is shockproof and waterproof. An Inner Mesh Pocket can be used to store small accessories.
FAQ
Is photography a rewarding job?
Photography is an artistic form that allows one to capture and share moments in time. It is also a great way to make money if you are willing to put in the hard work. If you want to become a professional photographer, there are many ways to do this. As a hobby, you could take pictures of your family and friends. This will help you to improve your skills as well as build your confidence. Once you have completed this stage you can move on and take on paid assignments. The best photographers make a living by their art. Sometimes they travel with clients to capture images of people having fun at events like weddings or parties. Professionals prefer to shoot commercial projects like product shots or advertisements.
You can only be successful if you know what type of photography is your favorite. After that, practice, experiment, then master your chosen style. You can't replace experience so don’t expect to be successful overnight.
As a beginner, you should aim to develop your technical skills first before focusing on creativity. Photography involves both artistic and technical aspects. It is important to learn the basics of composition and how to use the correct tools.
Also, consider whether or not you wish to pursue a career as a photographer full-time. Some people combine their love for photography with other jobs. For example, you might work at a local newspaper or magazine while pursuing freelance assignments. Others choose to dedicate their entire time to photography. Whatever your creative choice, you will need to be dedicated and committed to success in every field.
You will need to put in a lot of effort and time if you are serious about a career as a photographer. It is important to think carefully about what you really want to do with your life.
What can I do to improve my photography skills with my phone?
You don't need expensive equipment to take great photos! Amazing images are possible with just a smartphone.
Just need to learn the basics of how to use it all.
There are many apps to help you edit and share your photos on both Android and iOS.
Here are five tips for taking better pictures.
-
Set Up Your Camera App. The camera app should be pre-installed on the device. If it is not installed, you can download it from Google Play.
-
Use Filters & Effects. You can alter the appearance and feel of your photo using filters and effects.
-
Adjust the exposure. Adjusting exposure helps you control the brightness of your picture.
-
Take the right lighting. The brighter the light, the easier it is to see details. Low light photography allows you to capture shadows and highlights.
-
Take Pictures of People. It is a great way to share your love with others by taking pictures of them.
Check out this article to learn how to take better pictures with your smartphone: 5 Tips To Improve Photography Skills
Do I Need A Tripod?
This is one question that everyone wants to know. While a tripod isn’t necessary every time, it is useful.
A tripod allows you to stabilize your camera when taking photos at slow shutter speeds. Tripods can be a huge help when you are shooting landscapes or stationary subjects.
However, using a tripod to photograph moving subjects like people or sports can result in blurriness. What are the best ways to determine which situations you need a tripod for?
A tripod can be useful in any situation where you need to capture fast action or stationary subjects. Examples include:
-
Sports
-
People
-
Landscapes
-
Close-ups
-
Macro shots
Try this test to find out if you really need a tripod. You can hold your camera still while you look through the lens. If blurred lines appear or you feel movement, you will definitely need a tripod.
A tripod won't make any difference if there is no blurring.
Here are some tips for those who do decide to buy a tripod.
-
Smooth legs are a must for your tripod. This will stop unwanted vibrations shaking your camera.
-
Choose a sturdy tripod. Some tripods made of plastic may not last very long. You should opt for a steel tripod.
-
You may want to consider buying a remote-control device. You can control your camera remotely with this remote release. You can set it to fire the shutter once you press the button automatically.
-
You should look for a tripod with 360 degree rotation. This makes it easier for you to position your camera horizontally, or vertically.
-
Keep in mind that tripods aren't cheap. Expect to spend around $100-200. However, you'll get a lot of value for your money.
-
Don't forget about accessories like filters and memory cards.
-
Before buying online, check with your local store. Many retailers offer free shipping.
-
To find out what customers think about a product, read reviews.
-
Ask family and friends who have similar products.
-
Visit forums and message boards to learn about customer experiences.
-
User reviews can be found online.
-
Amazon.com is a website that allows you to compare prices and get customer feedback.
-
Check out these photo galleries for an example of the work that photographers do with their tripods.
What is rule of thirds for photography?
The rule of thirds can be used to create beautiful compositions, without having to use complicated camera settings. It divides your photo into nine equal parts horizontally as well vertically. This creates three main areas for your subject to appear. These are the top (upper left corner), middle (center) and bottom (lower right). These areas can be used as guidelines for positioning your subject within the frame.
The rule of threes can also help you avoid placing important items too close together. If you place them near each other, they may not have enough space between them to make a strong visual impact. They might lose focus if they are too close together.
How can I learn photography on my own?
There are many methods to learn how you can take amazing photos. You have the option to buy a book and attend classes, join an on-line community, or watch YouTube tutorials. It's better to learn the art yourself, if your goal is to take great pictures. That way, you have complete control over what goes into each photo. You'll only get better as long as your learning continues.
Digital photography doesn't require expensive equipment. All you need is a computer with internet access and a camera. You can do the rest.
Here are some tips for getting started:
-
Familiarize yourself with the manual settings for your camera.
-
Learn how the basic controls work.
-
Take many photos.
-
These should be edited.
-
Share them.
-
Keep practicing.
-
Experiment.
-
Explore different perspectives and angles.
-
Use light sources creatively.
-
Practice makes perfect.
-
Do not be afraid to fail.
-
Be patient.
-
Have fun!
Statistics
- In this case, 100% of readers who voted found the article helpful, earning it our reader-approved status. (wikihow.com)
- There are people out there who will pick at flaws they can only see in 100% crops of your photos. (wikihow.com)
- This article received 13 testimonials, and 100% of readers who voted found it helpful, earning it our reader-approved status. (wikihow.com)
- That's the easiest way to get blurry photos 100% of the time. (photographylife.com)
External Links
How To
How to photograph in low light conditions
Low-light photography means taking photos in dimly lit areas. It requires special equipment and techniques. The main challenges are controlling exposure, white-balance, and sharpness. Two types of low-light photography exist: ambient or flash. Flash photography works well when there is sufficient light around you. If there isn’t enough natural lighting, you will need to use a flash. For example, if your subject is indoors but outside, there might not be enough light to capture a good picture without a flash. If you don't want to use a flash, try shooting at night during the moonlit hours. This will give you some beautiful shadows and colors. Another option is to capture at twilight. Twilight is the time when the sun has set and there's still daylight.
You may also want to experiment with long exposures. Long exposures allow you to record images after the shutter has been open for several minutes. When the shutter remains closed, the camera records only light that falls on the sensor. The light that falls onto the sensor during a long exposure continues to be recorded. The shutter was not opened, so no new light entered the lens. The result is that there is very little movement. You can ensure clear images by turning off automatic settings such as autofocus or autoexposure. Adjust the ISO setting before you start to shoot. An ISO setting 200 gives you more control over how bright or dim your image appears. The shutter button should be pressed quickly when you are ready to take the photo. This will bring the shutter completely to a close. Then, you should hold the shutter button until the last possible second. By holding down the shutter button, you prevent additional light from entering the camera. Once you take the shot, wait a while before you release the shutter. This will allow the camera to process your image. You can view your photos while you wait on the camera. Save them once you are satisfied with them.