You don't know what phrases to use, no matter how experienced you are in photography. These phrases include hard vs. light, CMYK or Dots Per Inch and many others.
Hard light vs. Soft light
Choosing between soft and hard light is a crucial part of photography. Soft light produces a warmer, more aesthetically pleasing look, while hard light is more edgy. You can learn more about photography by understanding the differences between hard and soft light.
Soft light is produced by a larger light source that is located closer to the subject. This creates diffused light. Unlike hard light, soft light will produce fewer shadows on the face of the subject.
Because it is flattering to the skin and face, soft light is great for portraits. It reduces wrinkles and makes the image appear more natural.
CMYK
CMYK refers to a colour scheme that uses four primary color for printing photos. This contrasts with RGB which uses three primary colors to create colors on screens and digital displays.
While the CMYK scheme isn't as broad as the RGB scheme, it does include a few additional colors. The primary colors, cyan and magenta, as well as yellow and black, are combined with physical dyes to produce an incredible variety of colors. This is the foundation of the printing industry.
RGB is more sophisticated. The RGB color scheme allows real-life colors to appear on a monitor. The colors are created through adding and subtracting sunlight. You can mix millions of colors with the RGB color scheme. Its color scheme is used to create colors on TVs, the Internet, and even on your computer's monitor.
EXIF data
Whether you are a professional photographer or simply learning how to take better photos, you can benefit from studying EXIF data. It is usually displayed next to a photo on websites and can tell you much about the photo and how it has been taken.
By studying EXIF data, you can learn how to adjust your camera settings and take better photos. Learning from other techniques can help you to find the perfect balance of settings for your camera. This information can be used by you to build a network and grow your business.
Gobo
Gobo can add drama and texture in photography. It is also a good way to highlight eyes and mouth. It is also an excellent tool to liven up dull backgrounds.
Gobos can be made of cardboard or cloth. Gobos should be transparent enough that you can see the shadows. Also, textured glass will give you different levels of intensity. Also, hanging lace can help you create delicate shadow textures.
Gobos are not intended to be used with standard lighting. You should use a light stand or a light clamp to hold the Gobo in place.
Format 8x10
A 8x10 camera may be the right choice, whether you're just starting out or looking for a way to upgrade your existing camera. An 8x10 camera is easier to transport than a 5x7 and can be used with characters lenses. However, it can also be a bit of a challenge to get the best possible results.
While the 8x10 camera might be the 'wow' factor, it is still a small format and not for everyone. Many 8x10's are double the weight of their 4x5 equivalents. In addition, the depth of field plane is much thinner and requires longer camera movements than a comparable 4x5 camera. Sometimes, stopping down to 8x10 may be necessary.
Dots Per Inch
Whether you are an avid digital photographer or a sophisticate of the printed word, you should know about Dots Per Inch (dpi). Education is a great way to get started.
Dots per incl is more than just the number per square inch of paper that your printer prints. It's also a measure of the quality and quantity of a photo. For example, you can print thousands of dots per inch on an inch of film, but they won't look nearly as sharp on your computer monitor.
Forgotten perspective
No matter whether you are an expert or a beginner photographer, it is essential that you can use perspective to enhance your photos. Perspective is a technique used to create three-dimensional illusions in your photos. It uses converging line, vanishing spots, and lens distortion effects.
You can enhance the depth of your image by having a clear foreground with a foggy backdrop. You can also add many layers to your photo to create a sense of depth.
Forced perspective can be achieved by using a wide-angle zoom lens. It will make your subject appear larger than their actual size in the frame. This will give the impression of a vast distance between your foreground subjects and the background.
FAQ
What makes a good camera bag?
A camera bag protects your gear and is essential when traveling. These are the things to consider when shopping for a bag.
-
Size: Choose a big bag to hold your camera and accessories comfortably. Don't go bigger than you think you will need.
-
Durability: Choose bags made from durable materials like leather, canvas or nylon. Avoid plastic and fabric bags.
-
Protection: Make certain your bag is protected against dirt, dust, moisture, and scratches
-
Organization: Organize your gear by type so you can quickly access what you need. For example, put your lenses in one compartment, your memory cards in another, and your battery charger in yet another.
-
Comfort: Keep your hands free when shooting by using a shoulder strap instead of a handbag. Look for comfortable designs with padded straps.
-
Price: Shop around to find the best price. You may find some brands that sell their products at a discount price, which is a great bonus.
-
Warranty: Find out if your company offers a guarantee on its products. If your bag is damaged or lost, this will let you know who to contact.
Which Lenses Are Best?
Most beginners will ask this question: "Which lens should I buy?" Because there are so many options, it can be difficult to choose.
The good news? You don’t have to purchase a completely new lens for every new camera you buy. You can instead add lenses later.
For starters, here are three types of lenses you might want to consider.
-
Wide Angle Lens (14mm - 24mm): These lenses give you a wide angle of view, allowing you to capture more of your subject. You can also zoom in without losing image quality.
-
Normal/Standard zoom lens (28mm -70mm). These lenses allow the user to adjust focal lengths while still maintaining good image quality.
-
Telephoto Zoom Lens (70mm–200mm) : These lenses are ideal for photographing distant subjects. These lenses allow you stay focused on your subject even when they appear small.
These lenses can also be combined to produce different effects. To capture close-up details, you can switch between a normal and telephoto lens.
Is photography a good job?
Photography allows you to record moments in time and share these with others. If you are willing to work hard, photography can be a great way for you to make money. If you want to become a professional photographer, there are many ways to do this. Start by taking photos for your friends and family as a hobby. This will allow you to build confidence and improve your photography skills. Once you have completed this stage you can move on and take on paid assignments. The best photographers earn a living from their craft. They might accompany clients to parties or weddings, where they have to capture images that show people having fun. The majority of professionals prefer to shoot commercial projects, such product shots or ads.
To be a successful photographer, you must first identify what kind of photography interests you. Then practice, experiment, and try new techniques until you get comfortable with the process. You can't replace experience so don’t expect to be successful overnight.
Begin with technical skills, before moving on to creativity. Photography encompasses both technical and artistic aspects. Photography is a complex art that requires both artistic and technical skills. Understanding the basics of composition can help you achieve your goals faster.
Also, consider whether or not you wish to pursue a career as a photographer full-time. Many people combine their passion for photography and other jobs. A freelance assignment might allow you to work in a local paper or magazine, while still pursuing your passion for photography. Some photographers dedicate all of their spare time to photography. You have to put in the effort and be committed to any creative endeavor.
A serious photographer will have to dedicate a lot more time and effort if they want to build a successful career. It is important to think carefully about what you really want to do with your life.
Do I Need A Tripod?
This is one of those common questions. While a tripod isn’t necessary every time, it is useful.
It can be used to steady your camera while you take slow shutter speeds pictures. If you're shooting landscapes or other stationary subjects, then a tripod can make a big difference.
However, a tripod can blurriness if you are photographing moving subjects, such as people or athletes. How do you determine which situations need a tripod?
A tripod can be useful in any situation where you need to capture fast action or stationary subjects. Examples include:
-
Sports
-
People
-
Landscapes
-
Close-ups
-
Macro shots
Do this test to see if you are unsure if you require a tripod. Look through the viewfinder with your camera steady. A tripod is required if there are blurred lines, movement or other issues.
A tripod will not improve blurring if you don't notice it.
Here are some tips for those who do decide to buy a tripod.
-
You should ensure that your tripod has smooth legs. This will stop unwanted vibrations shaking your camera.
-
Make sure you choose a sturdy tripod. Some tripods are made out of plastic and may not be very durable. Look for a metal tripod instead.
-
Buy a remote release. This lets you control your camera remotely. It can automatically fire the shutter when you press the button.
-
Make sure to look for a tripod that rotates 360 degrees. This allows you to place your camera horizontally and vertically.
-
Keep in mind that tripods aren't cheap. Expect to spend around $100-200. You'll still get a lot for your money.
-
Accessories like memory cards and filters should not be forgotten.
-
Before ordering online, you should check in your local shops. Many retailers offer shipping free of charge.
-
To find out what customers think about a product, read reviews.
-
Ask friends and family members who own similar products.
-
Forums and message boards are a great place to find out about customer experiences.
-
Find user reviews online.
-
Use websites like Amazon.com to compare prices and read customer feedback.
-
View photo galleries to see the different uses of tripods by photographers.
How do you get started in digital photography
When you start out in digital photography, the first thing to consider is which type of camera you will use. There are many options: DSLRs (digital Single Lens Reflex Cameras), point-and–shoot compact cameras or camcorders. Each one has its advantages and disadvantages. DSLR cameras can produce high-quality images, but they are usually heavier and more bulky than other types. Point-and shoot cameras are smaller, lighter and have more automatic settings. Camcorders provide excellent video recording capabilities and may also feature still photo shooting modes. Smartphones are lightweight, portable, and light. They offer excellent image quality, advanced features, such as GPS mapping, music playingback, and Internet browsing.
After you have decided which type of camera you want to purchase, you need to decide if you prefer to buy a new or used model. Used cameras can be found at reasonable prices, especially if they were purchased within the last few years. Because manufacturers invest large sums of money in developing new technology, new models tend to be more expensive.
Next, you'll need to buy lenses. Lenses are crucial in determining the quality and appearance of your photos. They allow you to control the lens's focal length, allowing you to zoom into the scene without losing focus. Some lenses are equipped with flash units built in, while others require external flash units. Many brands offer many lenses with unique characteristics.
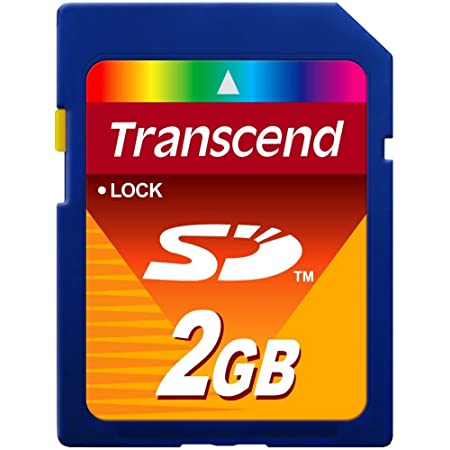
Finally, you need to purchase memory cards. Memory cards store pictures taken by your camera. It can hold hundreds to thousands of photos, depending on how big your card is. You will need multiple memory card if you plan on taking many photos.
How can I learn photography by myself?
There are many ways you can learn to take great pictures. You have many options. You could purchase a book or attend a class. Or you could join an online group. It's better to learn the art yourself, if your goal is to take great pictures. So you can decide what goes into each picture. As long as you continue learning, you will always be improving.
The best thing about digital photography? You don't need any expensive equipment. All you need is a computer with internet access and a camera. The rest is up to you.
These are some suggestions to help you get started.
-
Learn how to use the manual settings on your camera.
-
Learn the basics of controlling your computer.
-
Photograph lots.
-
Edit them.
-
Please share them.
-
Keep practicing.
-
Experiment.
-
Take a look at the world from different perspectives.
-
Use light sources creatively.
-
Practice makes perfect.
-
Do not be afraid to fail.
-
Be patient.
-
Have fun
Statistics
- While I cannot prove that all of those spots were not sensor dust, the photo was taken during a heavy snowstorm…so I guess that 99.8% of the spots are snowflakes. (bhphotovideo.com)
- The second easiest way to get blurry photos 100% of the time is to use a cheap filter on the front of your lens. (photographylife.com)
- Get 40% off Adobe Creative Cloud(opens in new tab) (creativebloq.com)
- In this case, 100% of readers who voted found the article helpful, earning it our reader-approved status. (wikihow.com)
External Links
How To
How to take macro shots in photography
Macro Photography is defined as the ability to capture small objects such as flowers, insects, and even people at close range. The term "macro" comes from the Greek word makros (makros), meaning large. When you use a lens with a focal length greater than 50mm, you can take pictures of things that are very close up.
A macro lens of high quality should have a large working distance and an aperture fast enough to produce sharp images. It is important to avoid motion while taking photos. Anything that moves during exposure may blur your image.
Here are some tips to take great macro photos:
-
Use a tripod. Use a tripod. This way, you'll have less chance of moving while trying to shoot.
-
Make sure you choose the right lighting. Most macro lenses come with built-in light filters, but if you don't have one already, buy one separately. This prevents excessive exposure.
-
Be patient! Shooting macros takes practice. Sometimes, you may only be able to see a small bug or flower. But it's worth the effort to keep taking pictures until you get it.
-
RAW file format allows you to shoot in it. RAW files have more data than JPEGs. They can store more detail. RAW files are better for editing later as you can make adjustments such as cropping and colour correction.
-
Remember to include the background. Even though you've got a nice foreground object, sometimes the background adds interest to your shot. Include it in your shot.
-
Keep learning.